Sunday, August 30, 2009
Upgrading to Snow Leopard
Posted by Matt Aimonetti
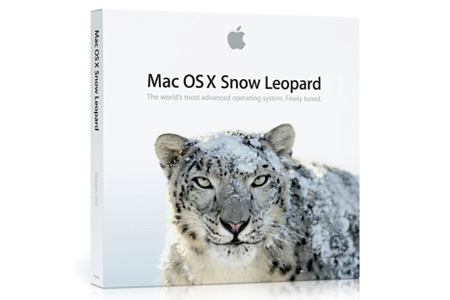
Last Friday, Apple released their new OS version: Snow Leopard. Upgrading to SL is very easy and even gives you back quite a lot of HD space. However a few things have changed in the OS and you need to understand what is going on so you won’t get frustrated with the updating process and won’t be wasting time fighting with the system.

The key change for us Ruby developers, is the fact that, in Snow Leopard, all the interpreted languages (including Ruby) are now running in 64-bit by default (obviously, only if you have a 64-bit machine). For pure Ruby applications and libraries this shouldn’t pose any problems. But if you are migrating from a Leopard environment where you compiled C extensions for 32-bit only, these gems won’t properly load in Snow Leopard. Same thing goes for libraries you might have compiled in 32-bit mode and that you might want to use on your migrated system.
Something else you need to know: Snow Leopard now comes bundled with Ruby 1.8.7 instead of 1.8.6. This should not be a problem since Rails has been running on Ruby 1.8.7 for a long time and Rails 3 will require Ruby 1.8.7 and prefer Ruby 1.9.2.
Here is a quick rundown of common tasks you might have to do to migrate properly.
Install Snow Leopard developer tools
On the Snow Leopard DVD, under “Optional Installs”, install “Xcode.mpkg”. Use all default options.
Passenger
$ sudo gem install -r passenger
$ sudo passenger-install-apache2-module Press Enter when prompted. Passenger will compile and install its Apache module. Press Enter when prompted the second time too.

$ cd /etc/apache2
Open httpd.conf in your text editor (if you use TextMate, try running mate httpd.conf from the command line) and look for a line like “LoadModule passenger_module” and some lines following that have “passenger” in them too. Delete them. If you don’t see them them, move your cursor to the end of the file.
Then insert these lines:
LoadModule passenger_module /Library/Ruby/Gems/1.8/gems/passenger-2.2.4/ext/apache2/mod_passenger.so
PassengerRoot /Library/Ruby/Gems/1.8/gems/passenger-2.2.4
PassengerRuby /System/Library/Frameworks/Ruby.framework/Versions/1.8/usr/bin/ruby
MySQL
To avoid weird issues with MySQL, it’s strongly recommended to upgrade to the 64-bit version. Start by shutting down mysqld if it’s running. (Depending on how you installed MySQL, you might be able to use the preference panel, or use sudo /opt/local/share/mysql5/mysql/mysql.server stop if you installed it using MacPorts)
Now install the Mac OS X 10.5 (x86_64) version of mysql from here
When the disk image opens, first install “mysql-5.1.37-osx10.5-x86_64.pkg”. Use all default options.
Next install “MySQLStartupItem.pkg”. Use all default options.
Next install “MySQL.prefPane”. Double-click to install it. Choose to replace the existing preference pane when prompted. (Apparently the preference pane is still 32-bit.) At this point you can click “Start MySQL Server” to start the server and verify it works.
Unmount the MySQL disk image.
Since you are upgrading from Leopard, your mysql gem is compiled for 32-bit only and therefore needs to be recompiled. However, it’s not that simple, the mysql gem is a bit of an exception. Under Snow Leopard when you do a gem install for a C extension it tries to build the extension for two architectures: i386 (32-bit) as well as x86_64 (64-bit). The problem is that the binary from mysql.com is not universal and therefore we need to force the C extension to be only compiled in 64-bit.
$ sudo env ARCHFLAGS="-arch x86_64" gem install mysql -- --with-mysql-config=/usr/local/mysql/bin/mysql_config
note: You shouldn’t have to set the ARCHFLAGS to compile any other gems.
MacPorts
You should be all set. However, if you are relying on any libraries you compiled on Leopard, you probably will have to recompile them. MacPorts users shouldn’t think that it will be automatically done for them.
You have different options to upgrade your ports.
The easiest way is to upgrade MacPorts:
$ sudo port selfupdate
$ sudo port sync
$ sudo port upgrade --force installed
Other native gems
Check this script to get a precise list of gems requiring to be reinstalled and some help with the upgrade process. Basically, you just need to reinstall the few gems using C extensions.